Tuesday, December 30, 2014

52 Weeks of Book Binding, Art Journals & more…

I have decided to start the New Year with a new project, or I should say projects. So, for 2015, I am going to create a book of some sort every week for 52 weeks.   

Now, not all of these will be books per se, but they will have something to do with books, be it a bookmark, a journal page, an altered book, or whatever, they will be book related.  The possibilities are endless.

I hope with each book I create or book related item, each would be unique in its own way.  I am not saying that you will not have seen these books before; I am saying I hope I can add my own twist.

Some of these books will be the same old, same old, traditional bound books; some will be bound in an usual way.  Others will be fancy and some, not so much. You might say, "Oh, I can do that" and hopefully encourage you to give it a try. Some will be simple and others more complex.  There will be some that will have lots of details, while others will be just "Plain Jane".  On some, I will have a tutorial, while others I will just show the finished product.

You may not like everything I create, but I do hope you will like at least one. This is a challenge for me and I hope I am able to complete the challenge I have set for myself. But, I do know, that in the end, I will not only have made lots of different kinds and styles of book, I will have had fun in the process.

So, come join me and give it a try and see what you can come up with and thank you for being a part of this journey with me.

Sunday, December 7, 2014

Christmas Cards

Every year I make my Christmas Cards and this year is no exception.  
For this year's Christmas Card, I made a Christmas Ornament and tangled inside.  
mounted the card on silver cardstock and then onto the card.  Added a black bow and viola!
 A card is born.


I think this card is my best one yet!

Monday, December 1, 2014

Ice & Snow ART

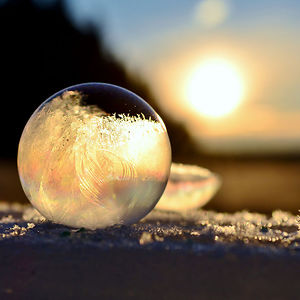
Follow the link to see beautiful Ice and Snow formations that look like art.  It's amazing how the beauty of mother nature cannot be surpassed by man. 
Frozen Bubbles
http://www.boredpanda.com/natural-winter-snow-ice-art/

Friday, November 21, 2014

Christmas Gifts

For the first time, I made soap and bath salts.  


These are Christmas gifts I made for my sewing group "Kneedlers".  

The group meets once a month to quilt ... by hand.  I guess you could say it is an old fashion Sewing Bee. Some of the ladies have finished two quilts already.  I am still working on mine. 

At the end of the year we have a potluck.  We all bring homemade goodies to share, plus our Christmas Gifts. The gifts do not have to be expensive or homemade.  It's just a way of sharing with each other and saying how much we appreciate one another.  


I decided on homemade Lavender soap and homemade Bath Salts.

Lavender Soap

Lavender Bath Salts

I had so much fun making these, that I'd like to try different fragrances and different types of soaps.  The soaps were made with an Aloe Vera Soap base.  

To finish off, I wrapped the gifts in paper bags and decorated them with a lace doily.  I added a Lavender Flower Pot cut-out with Lavender seed packets tuck inside.  I attached everything to the bags with a Lavender ribbon.

Thursday, November 20, 2014

Altoid Tin

Can you guess what is inside?


I will not take credit for this because it was not my idea, but I thought it was a great one.  The sincerest form of flattery is to be inspire by someone.  I saw this on Julie Fei-Fan Balzer's blog.  She shared how she made "her" little take along art kit.

Here's mine.

In my kit, I have watercolor paper, scissors, a water brush, pencil, eraser and watercolor paints.  I made mine to suit what I wanted.  You can made yours up any way that is best suited for you.


Here is a picture with everything tuck nicely inside.

Fold up my watercolor paper, put it in my purse or pocket and I am ready to go

Wednesday, November 19, 2014

Beads, Beads, Beads

Yesterday I took a paper bead class with Dee Rick. 

It was the last class in a series of three.  I learned to make beads starting from basis beginner to advance and then some.  

I have made beads in the past, but they were always your simple basic beads that we have seen a million times.  In these three classes, I learned a variety of different beads, from small to LARGE.  I learned to make tear drops, barrel, tube and double rolled beads.


I learn that your everyday paper is not the only thing you can use to mak beads, you can also use napkins, calendars, magazines, mailers and on and on and on.

Dee has a creative talent for making and designing paper beads.  If at all possible you should take a class from her.  She has so much to share.  She has some tutorials on her Facebook page, and you can buy beautiful paper she designs from her Etsy Shop.  She also has lots of pre-made beads to choose from too.

Monday, November 17, 2014

Blue Twig Studio

I am one of the Design Team Members for Blue Twig Studios.  Deb Prewitt, CZT, is owner of Blue Twig Studio, located in the beautiful state of Colorado.   As a Design Team Member, I was sent a goodie bag of Faber-Castell products.  I was to come up with a tutorial using these products.

Here is the end product from by goodie bag:


You can see the tutorial on how to make this here, and there is a list of all the products used.  You can also purchase any of the products used at Blue Twig Studio.  Other tutorials to watch?  "Skeleton Leaves", by Joy Hellman.

Sunday, November 16, 2014

ZIA

Designing  this card was not only fun, but easy.  I used the Zentangle Pattern, "Nzepple" to get it started.  I wanted to do something with this, but was not quite sure what to do.  We create our Zentangle tiles and sometimes wonder, "Now what?"  

I have a friend who does party themes and creates digital images which she sells on her Etsy Shop.  I sent this over to her to have her do something with this:


And this is what she came up with:

She not only made a card for me, but a seal for the envelope too.  See the comparison?

 But wait!  There's more!  
She also made me some party favors to go with my invitations.

Cupcake Toppers


Bottle Wraps


I just love how she kept the Party theme a Zentangle theme, using black and white.  Did you notice how she changed the designs, every so slightly, by adding dots to some and not to others?

Friday, November 14, 2014

ZenDoodle: Oodles of Doodles

A new book from Northlight Books is coming out next month titled, "ZenDoodles:  Oodles of Doodles", which I am one of the spotlight artist.  Some of my ZIAs (Zentangle Inspired Art) is on the front cover.  I can hardly wait.  I have not yet seen the book, so I am looking forward to receiving a copy.


You can purchase and read more about the book here.  To get a sneak preview you can take a look see here, and also purchase the book here as well.  There are lots of ZenDoodles to see and try.  There are Oodles of Doodles ;-)

Monday, November 10, 2014

Crochet Rock

Crochet Rock?


I don't know if it's a new craze or if it had been around for awhile, but I just recently found out about these crochet rocks.  There really isn't a crochet pattern for these, because each one is different.  It took me two days to finally figure what to do.  Whew!

Top side
Basically, you start off with a simple pattern, crocheting in the round.  As your pattern grows, you start to shape it to the rock until you form the crochet pattern around the rock.

Underneath side
When you are on the underneath side of the rock, you then have to continue to crochet with the rock inside, to keep it from slipping out.  Not an easy thing to do.  But, in the end, I think it turned out quite well.  I will be doing more of these, now that I have gotten the hang of it. 
Possibly Christmas gifts?

Sunday, November 9, 2014

Fall Leaft

Having fun with fall leaves yesterday at the ARTbar.  We took some leaves and traced around them on watercolor paper.  We then water colored within the line with Twinkling H20s and used the different colors as our strings.  Now comes the fun part.  What to tangle?  

TANGLED FALL LEAF
Using the color as our strings was so much fun.  Picking and choosing what tangles to use within each color inspired the creativity inside.  I love how my fall leaf looks.  I love the uniqueness of it too.  I can do this 100 times and each time it will be different.


Since my leaf was done on a folded piece of watercolor paper, I think I might turn this into a cover for a journal and journal all my Autumn thoughts.  Although here in California it is still in the 80s, I can image, can't I?

Sunday, October 26, 2014

Zentangle Pumpkin

Another day at the Art Bar yesterday.  In keeping with the theme of Halloween this Friday, we drew and tangled a Halloween Pumpkin.  Tangles used were Vache 1, Diva, Web, Candy Corn, and Barbz.

Zentangle Halloween Pumpkin
We also share some variations on tangle patterns that could be used for Halloween patterns, like Tripoli for the Candy Corn.  In the pumpkin, Nzepple was used to make the candy corn. Diva for the tree in my pumpkin on the left.  For added effect, Hollibaugh for the bones.  Just curve the ends and you've got bones.

What tangle patterns can you vary to come up with for Halloween patterns?

Monday, October 20, 2014

"Hello" Card

I'm not a card maker by any means, so when I do make one, it's a challange for me and an accomplishment in itself.  

This is what I have been working on.  I still want to add a bow on the right side (lime green), and then I think it's pretty much finished.  For the picture on the front of the card, I doodled an image, creating flowers, leaves and dandilion seads.

As for the envelope, I tore out a page from Somerset Sutdio Magazine.  The page fit perfectly and I was able to manipulate the folds, so the picture landed in the front.


All I need to do now, is put an address lable and stamp, and it's ready to be mailed.

Sunday, October 19, 2014

Zentangle Class

Yesterday, October 18, 2014 I gave a class on Basic Zentangle at Monica's Quilt and Bead Creations.  I had quite a few eager students and we had lots of fun creating lots of different Zentangle patters.

Here are some of the tiles my students created:


They did a great job.  I am sorry to say, though, I don't remember which student did what tile ;-(, but I have to say they were a great group of ladies!

Friday, October 17, 2014

Creative Living with Sheryl Borden

Last Thursday, October 9, 2014, I was in Portales, NM.  Why?  To be on the show Creative Living with Sheryl Borden..  I was invited to three segments on Zentangle.  A little nerve wracking at first, but Ms. Borden has a way of making you feel comfortable and at ease.  Below is a picture of one of the segments.


You can see there were lots of things to share about Zentangles and what to do with them once you learn the basics, such as ZIAs (Zentangle Inspired Art).

Creative Living with Sheryl Borden network is a PBS station and is aired on KENW-TV.  We get it on KVCR, channel 28.

Wednesday, July 23, 2014

Encaustic Beeswax Art

This past Sunday I took another Encaustic Beeswax Workshop at Inspired Studio in Old Town San Diego.  We collaged on a canvas board, added some embellishments and painted a little and then sealed it all with Beeswax.  If you've never tried it before, you should give it a shot.  It is lots of fun and not at all as hard as you may think.
Lady in Waiting

The month before I took my first Encaustic Beeswax Workshop at The Stampin Post in Old Town Temecula.  With this one we used a Gallery Wrapped Canvas, collaged, embellished and sealed it all with Beeswax.
By the Sea
They are both so totally different from each other.  I like them both, but although I am not a pink person I like my Lady in Waiting better ;-)

Thursday, May 29, 2014

Zendala

I don't know why I did not come up with this idea sooner.  We do Zendalas on White Tiles, on Black Tiles and yes, even on Tan Tiles.  But, why has anyone not thought of the idea of combing any or all of the above. 

Well, here is my version of a black and white Zendala using black and white.


I had so much fun creating this that I will be experimenting more using this method.

Wednesday, May 28, 2014

The Art Bar

Two Saturdays ago, I drove out to the Art Bar in Santa Ana for some Zentangle fun, and ended up staying for some Mixed Media fun as well.

In the morning we worked on some Zentangle Tiles, using black tiles with a white pen.  Here's one I particularly like called "Triamonds"


These are the same Tiles, just turned differently from each other.  You can see how the pattern changes to look like a completely different one, although they are the same Tiles. 


The second session was Mixed Media Graffiti.  We first worked on tags to get the idea of Mixed Media Graffiti for us beginners.  I really liked this method and really, really enjoyed the process.  My favorite of the three tags is the one on the right.  It has an earthy feel.


When we felt were comfortable with this process, we moved on to Canvas for our final project.
I think I liked working on the tags more, than on the canvas.  Either way it was lots of fun.

Thursday, March 13, 2014

Zendala of the Day

I've home with a cold the last few days and because of it, have become increasingly bored.  I decided while I was resting that I would relax with a Zendala (Zen Mandala).  I had no idea how I would start, or what I would create.  Here is the end product of my Zendala.


If you will look closely, you will see colors and images in the drawing.  This is because, it's a monoprint that I did and ended up not liking.  So, I cut it up the monoprint to use as the background for my Zendala.  You can see the full print I did on my February 21, 2014 post.

Saturday, March 1, 2014

ZIAs

Zentangle Inspired Art

Playing with color.  What do you see?
Dab of watercolor with some Twinkling H20s.

In progress.
This is a monoprint that was previously done by Sharla Hicks.  I took the print and started tangling on it taking the images I saw, as my inspiration.

Free-form Zendala.

Nzepple

Playing with the Nzepple pattern.

Friday, February 28, 2014

Twenty-eight Days of Art

Well, here we are.  Day 28.  
Did not think I was going to make it through all twenty-eight days.  Trying to come up with twenty eight ideas really pushed me, but I think that was a good thing.  
But, how apropo that the last day should fall on my Wedding Anniversary.  
So, for the grand finale, my Anniversary card to my husband, for sharing so many wonderful years together.

I found this cute little saying on the internet and printed it out on cardstock.

This quote by Cassandra Clare fit us perfectly.  When we met, he did come walking towards me, 
with a great big smile.